


Intro
Angular is a fantastic framework that helps you to split your codebase into different contexts. But if your codebase grows, the CLI’s time for building or serving your application increases significantly. Thus keeping the context safe from wrong dependencies is difficult.
Using Nx, you can upgrade your codebase to the next level; Nx provides tools for modularizing your codebase and imposing architectural constraints (to help maintainability, scalability, etc., etc.). It also allows you to visualise your modules through a project graph and uses this info to improve your developer experience. What is more, it also saves time in your routine.
What is Nx?
If you open the nx.dev website, you’ll find this definition: “Smart, Fast, Extensible Build System.” In a nutshell, Nx is a powerful CLI shipped with tools to improve developer productivity, ranging from task running and speeding up CI to scaffolding code.
Nx was born to improve the Angular CLI, and however nowadays, it is framework agnostic; it can be used with Angular, React, WebComponents, and Node applications supported by the official team, but you can also use it with other technologies like C#, Java, Kotlin, as
Nx is pluggable to manage all of these technologies. There are official plugins or packages (maintained by the core team) and community packages (maintained by the community). But, if you want, you can create your own plugin from scratch or extend one of the existing ones.
Before moving on, I would like to present you what is the scope of Nx in your repository if you decide to go through with it: Nx intends to improve the DX of your projects by:
- reducing waste of time on CI and in your work routine
- providing automated upgrades to keep the tooling evergreen
- removing all the boring and tedious processes
- leaving the team owner the development of the business value for the project only
How to create a project with Nx
Let’s start to get your hands dirty with Nx. To initialise a project with Nx, you have to use a simple command:
> npm create nx-workspace
You can use npm, yarn, or pnpm. It’s up to you, and you can find all the info on the official website.
After typing the command and pressing Enter, the script asks for some info:
- Where would you like to create your workspace? angular.love
This name is used first for the name of the folder of your repository. Second, it is the npm scope of your repository - Which stack do you want to use? None
Nx proposes different stacks: None, Angular, React, or Node. The first option is a stack completely empty, and it’s up to you to configure and install the plugins; the others are already ready to be used, as Nx suggests, for every technology. - Package-based or integrated? Integrated
Technically, there are the following Nx projects
– monorepos (package-based & integrated)
– standalone (single-project workspaces, e.g. what the Angular CLI generates; so not a monorepo) - Enable distributed caching to make your CI faster Yes
I’ll speak about the cache after, but this option allows you to improve the execution of different scripts like building or testing and reduce the time wasted by your developers and your CI.
Ok, now the result looks like this:
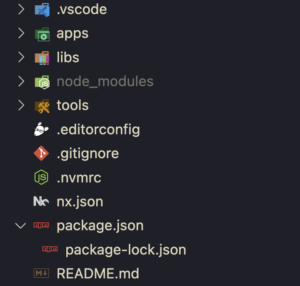
As you can notice project structure is pretty simple: there are three core folders:
- apps: this folder will contain all the applications of your Monorepo
- libs: this folder will contain all the libraries of your Monorepos. This folder is essential because it helps split your codebase into many small packages and permits to have libraries focused on specific boundaries or utilities.
- tools: this folder will contain custom scripts to automate your flows.
Before jumping to the next step, you must configure the repository to handle angular projects. To do that, you have to install your first plugin in the repo. So go back in the terminal and type:
> npm i -D @nx/angular
This command adds the @nx/angular library to the dev dependencies, and now you are ready to start creating your first application with Nx.
Code is available here.
Add your first application
It’s time to create your first Angular application with Nx. As said before, Nx is a CLI, so that you can do that through a command:
> npx nx generate @nx/angular:application --prefix=ngl
This command is interactive. Therefore, you have to answer some questions that help you to create the best setup for your case:
- What name would you like to use for the application? E-commerce
- Which stylesheet format would you like to use? scss
- Would you like to configure routing for this application? yes
- Would you like to use Standalone Components? Yes
I think every question is explicit if you know Angular, so I don’t want to go too deep into them.
The result comes out weird if you haven’t seen Nx before. Now, you have two new applications in the apps folder: e-commerce and e-commerce-e2e. The first is your Angular application ready for your next features, and the second is a Cypress project that you can use to test e2e, your e-commerce application. I won’t go into great detail about e2e testing with Cypress in this article, but if you are interested in the topic, you can find many resources on the Cypress website or on the Nx website.
Ok, now it’s time to talk more about your new Angular application.
First of all, it can be run with a simple command:
> npx nx serve e-commerce
Now, in your browser, you can see the application running on this address: http://localhost:4200/. You should see the following:

This is the result of the initial setup exposed by Nx.
Now you can prepare your application to accept your next features.
Go to the folder apps/e-commerce/src/app and remove the files nx-welcome.component.ts, app.component.html, app.component.scss, and app.component.spec.ts.
Then, edit the app.component.ts removing the NxWelcome component.
The result looks like this:
|
1 2 3 4 5 6 7 8 9 10 11 |
import { Component } from '@angular/core'; import { RouterModule } from '@angular/router'; @Component({ standalone: true, imports: [RouterModule], selector: 'ngl-root', template: `<router-outlet></router-outlet>`, }) export class AppComponent {} |
Now your application is empty and ready to contain your next feature.
If you already know Angular, there isn’t anything new for you in this application. It’s a simple Angular application with standalone components.
When you work with Nx, you have to imagine the application as the orchestrator of your platform. Inside the applications, you have to link together all the libraries. There is no need to include any business rules inside the applications.
The applications should only orchestrate your libraries, which should contain your business rules; I know, at this moment, it is a bit difficult to understand these two concepts, but at the end of this article, you’ll appreciate the benefit of these two core principles with Nx along with the reason why they are so important.
Now it’s time to move on. Take a look at libraries and create your first one.
Code available here
Add your first library
To create your first library, you have to run another command:
> npx nx generate @nx/angular:library pages --buildable --directory=libs/home --inlineStyle --inlineTemplate --prefix=ngl --standalone
This command is a bit long. Therefore later, I’ll show you how to simplify it with a plain extension called Nx Console, but for now, I want to focus on explaining what it does.
First, npx nx calls the Nx CLI. Then generate indicates that you want to generate a scaffolding of something, but what? In this case, by using the syntax </span><i><span style="font-weight: 400;">@nx/angular:library, you point to the need to create a library as exposed by the </span><i><span style="font-weight: 400;">@nx/angular module. Page is the name of your library. Directory, inlineStyle, and inlineTemplate are already explicative imagine; directory is the directory where you want to store the library in the repo, inlineStyle indicates that you want the style inline in your .ts file, and the same is for the inlineTemplate but for the html of your components. Prefix indicates the prefix of the selector of your angular components, and standalone is for creating a library with standalone components.
But now I want to talk about the buildable flag.
In Nx, there are three types of libraries: Workspace, Buildable, and Publishable.
Workspace libraries are libraries without the build script. Basically, you can test or lint them, but these kinds of libraries don’t produce an artefact.
Buildable libraries are like workspace libraries but with the build command, which allows you to build these libraries and create an artefact of your library. I’ll explain better the benefit of this in the future, but the artefact creation permits Nx to improve the performance of your building both in development and in CI.
Publishable libraries are like buildable libraries but with the publish command. This command lets you publish your library in an Npm registry (Npm, GitHub, or wherever you want).
To describe better three types mentioned above, there is a simple picture of them below:

Ok. After this explanation, it’s time to take a look at the result of the command.

Now, a new subfolder home/pages containing the new library appeared, as you can notice in the libs folder. The code inside is quite simple, so I don’t want to delve into it. However, I would like to say a few words on the project.json file.
The project.json file is crucial for Nx, similar to the angular.json file for the Angular CLI. This file describes all the commands enabled for the library, and there is its’ configuration for every command. The commands are inside the targets node in the file; therefore, it’s essential to keep in mind “target” because, in Nx, commands are called target.
You can find more info here.
Ok, now it’s time to check something in the browser, so go into the apps/e-commerce/src/app/app.routes.ts and add a new route; the new file will look like this:
|
1 2 3 4 5 6 7 8 9 10 11 |
export const appRoutes: Route[] = [ { path: '', pathMatch: 'full', loadComponent() { return import('@angular.love/home/pages').then( (c) => c.HomePagesComponent ); }, }, ]; |
Then run the command:
> npx nx serve e-commerce
In your browser, you should watch the new component and the text “home-pages works!”.
Let’s create a new library for the products so you can possess a project with something more:
> npx nx generate @nx/angular:library pages --buildable --directory=libs/products --inlineStyle --inlineTemplate --prefix=ngl --standalone
Connect this new library in the app
apps/e-commerce/src/app/app.routes.ts
|
1 2 3 4 5 6 7 8 9 10 11 12 13 14 |
import { Route } from '@angular/router'; export const appRoutes: Route[] = [ { path: 'products', loadComponent() { return import('@angular.love/products/pages').then( (c) => c.ProductsPagesComponent ); }, }, … ]; |
Then rerun the application. After that, if you navigate in the /product path, you should see the product page.
Ok, in my opinion, now you are the owner of a beautiful e-commerce app ?
Before closing this paragraph about libraries, I would like to provide you with one more concept about libraries in Nx. If you want to create a scalable application with Nx, you have to split your code base into various libraries of different types. Basically, if you work in a frontend application, the types that describe your library clearer are Feature libraries, UI libraries, Data-access libraries, and Utility libraries. It’s your business to identify and split the code in these kinds of libraries to create a scalable and well-structured codebase. As always in our job, there is no right nor wrong way to do this splitting, but there are different patterns, which you can follow to have a well-structured codebase, and some custom patterns, which you’ll learn after some iterations. You’ll probably have to try, make mistakes, change, and finally, you’ll find your perfect structure. It’s a standard approach in our job to iterate in order to find the best solution for the problem, as every project has different requests and constraints. However, Nx tries to help you solve this problem by suggesting an idea to follow that you can find in the official documentation.
When I started this article, one of the questions I received was about how to split the application from bottom to top and not from top to bottom; so, in a nutshell, how can I start to split my application from the code and not from the business contexts? I considered this problem for a long time, and I came up with these considerations: to create a scalable application, you must know your bounded context; it’s essential to understand because that’s how the business of your platform works. Therefore, splitting a codebase from bottom to top is impossible to my mind; the risk is creating a codebase that does not describe the business value. Another risk may be unnecessarily introducing connections between parts of the code. Basically, your code must respect the bounded context of the business; the business guides your codebase and not vice versa. The codebase must bring value to the company; therefore, in order to design a well-structured codebase, you must know your business and reflect it in your architecture. So, to my mind, it seems impossible to split a codebase from bottom to top; I might be wrong, as the next day, someone may mark it as possible, but at this moment, I’m unable to find a solution to that issue. However, if your code is a disaster, sometimes thinking about Conway’s law may be beneficial, and maybe it’s better to put more effort into the communication than into the code ?
Code available here
Tags to prevent wrong dependencies
Now you know how you can create your applications and your libraries but create the wrong dependencies between them is easy.
There are two ways to handle this problem; first, leave the responsibility to the team; this is the easiest way, but it is also easy in this case to notice the problem when the disaster is already made. The second way, and the way suggested by the Nx team, is using the power of tags in combination with Eslint.
Tags are simple labels decided by the Team to identify two kinds of stuff, the technical function and the business context of the library or application.
Let’s start identifying these tags, and then I’ll move forward to the example.
Regarding the technical tags, basically, the Nx team suggests using the concepts seen before feature, UI, data-access, and utility. The suggestion for these kinds of tags is to use a prefix like type: so the tags become: type:feature, type:ui, type:data-access, type:utility. There are also two additional tags: type:app and type:e2e used to describe the applications and the e2e applications.
Then there are another critical group of tags used to describe the business value of the libraries or applications; these tags use the scope: prefix and then are followed by the scope of the library: for instance: scope:home, scope:products or scope:shared. As you can notice, in this case, the team is in charge of identifying the scopes covered by the applications.
You can find more info about tagging here if you want to dive into it.
Ok, now it’s time to understand how to convert all these beautiful words into real benefits for the repository.
First, open the .eslintrc.json in the root of the project. This file contains the rules for your repository. By default, Nx is configured to accept every dependence between the module; you can check this in the file’s content where you find this piece of code.
|
1 2 3 4 5 6 7 8 9 10 11 12 13 14 15 |
"rules": { "@nx/enforce-module-boundaries": [ "error", { "enforceBuildableLibDependency": true, "allow": [], "depConstraints": [ { "sourceTag": "*", "onlyDependOnLibsWithTags": ["*"] } ] } ] } |
To indicate to Nx how dependencies constraint works, you must change the depConstraints array and add your rules.
For the app of this article, I created this solution:
|
1 2 3 4 5 6 7 8 9 10 11 12 13 14 15 16 17 18 19 20 21 22 23 24 25 26 27 28 29 30 31 32 33 34 35 36 37 38 39 40 41 42 43 44 45 46 47 48 |
"rules": { "@nx/enforce-module-boundaries": [ "error", { "enforceBuildableLibDependency": true, "allow": [], "depConstraints": [ { "sourceTag": "type:e2e", "onlyDependOnLibsWithTags": ["type:app"] }, { "sourceTag": "type:app", "onlyDependOnLibsWithTags": ["type:feature", "type:util"] }, { "sourceTag": "type:feature", "onlyDependOnLibsWithTags": [ "type:data-access", "type:ui", "type:util" ] }, { "sourceTag": "type:ui", "onlyDependOnLibsWithTags": ["type:ui", "type:util"] }, { "sourceTag": "type:data-access", "onlyDependOnLibsWithTags": ["type:api", "type:util"] }, { "sourceTag": "scope:shared", "onlyDependOnLibsWithTags": ["scope:shared"] }, { "sourceTag": "scope:home", "onlyDependOnLibsWithTags": ["scope:shared", "scope:home"] }, { "sourceTag": "scope:products", "onlyDependOnLibsWithTags": ["scope:shared", "scope:products"] } ] } ] } }, |
The technical configuration, is a general configuration that you can reuse in different projects. For the scope part, instead, you have to rebuild it in every repository and use the proper scope for your case.
Ok, you have defined your constraint, but now you must tag your libraries and applications. To do that, you have two ways, add the tags in the package.json file or in the project.json file of your modules.
For this article, I added the tags in the project.json file; here is an example:
|
1 2 3 4 5 6 7 8 9 10 11 |
{ "name": "products-pages", "$schema": "../../../node_modules/nx/schemas/project-schema.json", "sourceRoot": "libs/products/pages/src", "prefix": "ngl", "tags": [ "type:feature", "scope:products" ], … } |
You can find the rest of the configuration here.
Now to show you a real scenario, I want to add another library to the application with the following command.
> npx nx generate @nx/angular:library ui --buildable --directory=products --inlineStyle --inlineTemplate --prefix=ngl --standalone --style=scss --tags=type:ui,scope:products
As you can notice, this library is a UI library for the products.
For instance, if you try to use the component inside of this library in the home/pages library, you’ll notice a problem.
libs/home/pages/src/lib/home-pages/home-pages.component.ts

If you have VsCode and the EsLint extension already setup up, you can notice that the extension shows an error, and the message says that a project with “scope:home” can only depend on libs tagged with “scope:shared” and “scope:home”.
If you don’t have the extension, you can run the following command
> npx nx run-many --target=lint
And the result is the same:

As you can imagine, if configured well upfront, this configuration can prevent weird dependencies in your projects.
If you remove the ProductsUiComponent from home and move it into the products page component, you’ll notice that the problem disappears, and everything works fine.
Code available here.
Commands fast with cache
As you can notice, Nx allows you to use different commands, and you’ll probably think that all these commands can reduce your productivity during your daily routine; you’ll wait a lot of time until they’ll finish, and you’ll take a lot of coffee break.
But Nx has one of its killer features here. Nx can cache the result of your commands and reuse them in the future to improve your productivity and your Dx.
If you open the nx.json in your project root, you can notice an explicative property.
|
1 |
"cacheableOperations": ["build", "lint", "test", "e2e"], |
This property indicates to Nx which targets must be cached.
To show you how this work, you can run the following command:
> npx nx run-many --target=build --skip-nx-cache
or
> npx nx run-many -t build --skip-nx-cache
You probably have to wait four or five seconds before the script will be finished; this is because the script doesn’t use the cache
If you try the command without the –skip-nx-cache option:
> npx nx run-many --target=build
Probably this time, the script will finish in a bunch of milliseconds; if not, rerun it, and you will have the script completed in some milliseconds. The same is for test, lint, and e2e targets.
Nx caches the artefacts based on some parameters, like the version of the packages in your package.json, the hash of the file, and some other stuff. And if you, for instance, change a file and rerun the script, Nx reruns the script only for the affected code by your changes.
For instance, if I change the text of the component in the libs/home/pages/src/lib/home-pages/home-pages.component.ts and I run the build script:
> npx nx run-many --target=build
The output looks like this.
✔ nx run products-ui:build:production [existing outputs match the cache, left as is]
✔ nx run products-pages:build:production [existing outputs match the cache, left as is]
✔ nx run home-pages:build:production (1s)
✔ nx run e-commerce:build:production (2s)
As you can notice, the build target has rebuilt only the home-pages and the e-commerce modules; because the product modules are unaffected by the changes, and Nx can reuse the existing artefacts.
This is an excellent feature that can improve your routing and maybe your CI too.
Yes, I said CI because Nx offers a product called Nx Cloud that permits you to share the artefacts between different devices. So if one team member has already built that version, your CI can download the artefacts, and the CI will take less time to do its stuff. This product is not free, and you can find all the details here, but if you have an open-source or personal project, you can use it for free without any problem.
Nx Console to improve your DX in VsCode and WebStorm
At this point, I think you have a headache with all this new information, and you are probably thinking about how you can remember all these commands. In my opinion, the Nx team has tried to fix this problem in a wonderful way. They have created two excellent extensions, one for VsCode and one for WebStorm, and the name of this extension is Nx Console. These extensions allow you to interact with the CLI through a simple UI. This UI permits you to run commands like build, test, and lint; create new applications or libraries; run a single command in a specific project and many other simple utilities that improve your DX in your routine work. Just to leave you an idea of what this extension does, in VsCode, it has this visualisation

As you can notice, there are different sections: projects generate & run target, Nx Cloud, and common nx commands. Using this simple UI, you don’t have to keep in mind all the commands, but you have only to decide what you want to do and click the relative option; then, if you have to do nothing, the extension will run the command for you, else, it will open a new tab in your editor, you will have to fill the input to indicate the params to your command and then press the button to run the execution. In my opinion, this extension is really helpful and improves the DX a lot. You have only to know what you want to do, then let the extension guides you to the path to achieve your result.
Visualise your project with Project Graph
Before closing this article, I want to leave you with the last notion about Nx.
In my opinion, the killer feature of this tool is the Project Graph. What is Project Graph? Using Nx, as you can understand, you can create many small libraries and applications in relation. Having a picture or a graph showing your project’s status is important because you can see the relationship between the module, and maybe you can understand what creates a relation between two different modules. The goal of the Project Graph is this. Project Graph is a web application that permits you to see the status of your project, and you can run it in two ways, by CLI through your terminal or by the Nx Console extension.
For this time, it is better to use the CLI command for the terminal, so go back to your terminal and run the following command.
> npx nx graph
The result is a new tab in your browser that looks like this.

If you don’t see all the projects click the “Show all projects” button on the left.
As you notice page shows all the modules in your repo, and you can see how the module are in relation.
If you click on the relation arrow, you can also see which file creates the relationship and the relation type: dynamic or static.


Project Graph exposes another critical view; through this UI, you can see the impact of your changes. If you change the component in the file angular.love/libs/products/ui/src/lib/products-ui/products-ui.component.ts, adding a new text, for instance, and you run this command:
> npx nx affected:graph
This time the result is a bit different:

As you can notice, this time, the result shows the modules affected by the changes with a different colour. That helps you to understand the impact of your changes and how many modules could be affected by the changes. This tool is excellent because it lets the team know how the repo grows and will enable developers to understand the impact of a new feature or a fix.
Last but not least, the affected model is used under the hood also by Nx CLI to improve the execution of the scripts like build, test, or lint: and run them only in the affected module and not in the others.
Conclusion
It’s time to wrap up this article. You learnt what Nx is and how to create a project. You made an application through the Nx CLI and discovered the benefits of splitting applications in libraries. You know which kinds of libraries exist in Nx and how you can prevent the wrong relation between libraries with different scopes. I hope you have understood how important it is to use libraries to create small modules that permit you to develop scalable applications with Nx.
Tasks’ caching doesn’t have secrets for you now, and I hope it improves your productivity in the future.
Nx Console helps you to improve the DX with Nx in your favourite editor and allows you to forget all the commands’ options guiding you in the execution of them.
Last but not least, Project Graph visualises the status of your repository, and it can show you all the relations and what the changes affect during your development.
I know Nx could seem challenging to learn and understand, but in reality, it’s straightforward; when you have discovered these core concepts described in this article and after some practice, you’ll love it, and you will have all the notion of creating scalable angular applications and not only.
I told only about Monorepo in this article, but in the last period, the Nx Team has been working on a new way to work with Nx, the standalone project. This setup permits you to have all the benefits of Nx in a repository with only one application. You can find more here if you are interested.
I hope you enjoyed this article, and if you want to dive into Nx, the Nx docs and the Nx Youtube channel contain many materials to learn it.
Thanks for reading this far 🙂
The code of this article is available here
Leave a Reply